Before the mid-90s, cars didn’t tell you what was wrong via a screen. They blinked at you in code. Today, we have standardized ports and handheld computers. Here’s how to handle both.
The OBD-I Era (Pre-1996): The Paperclip Method
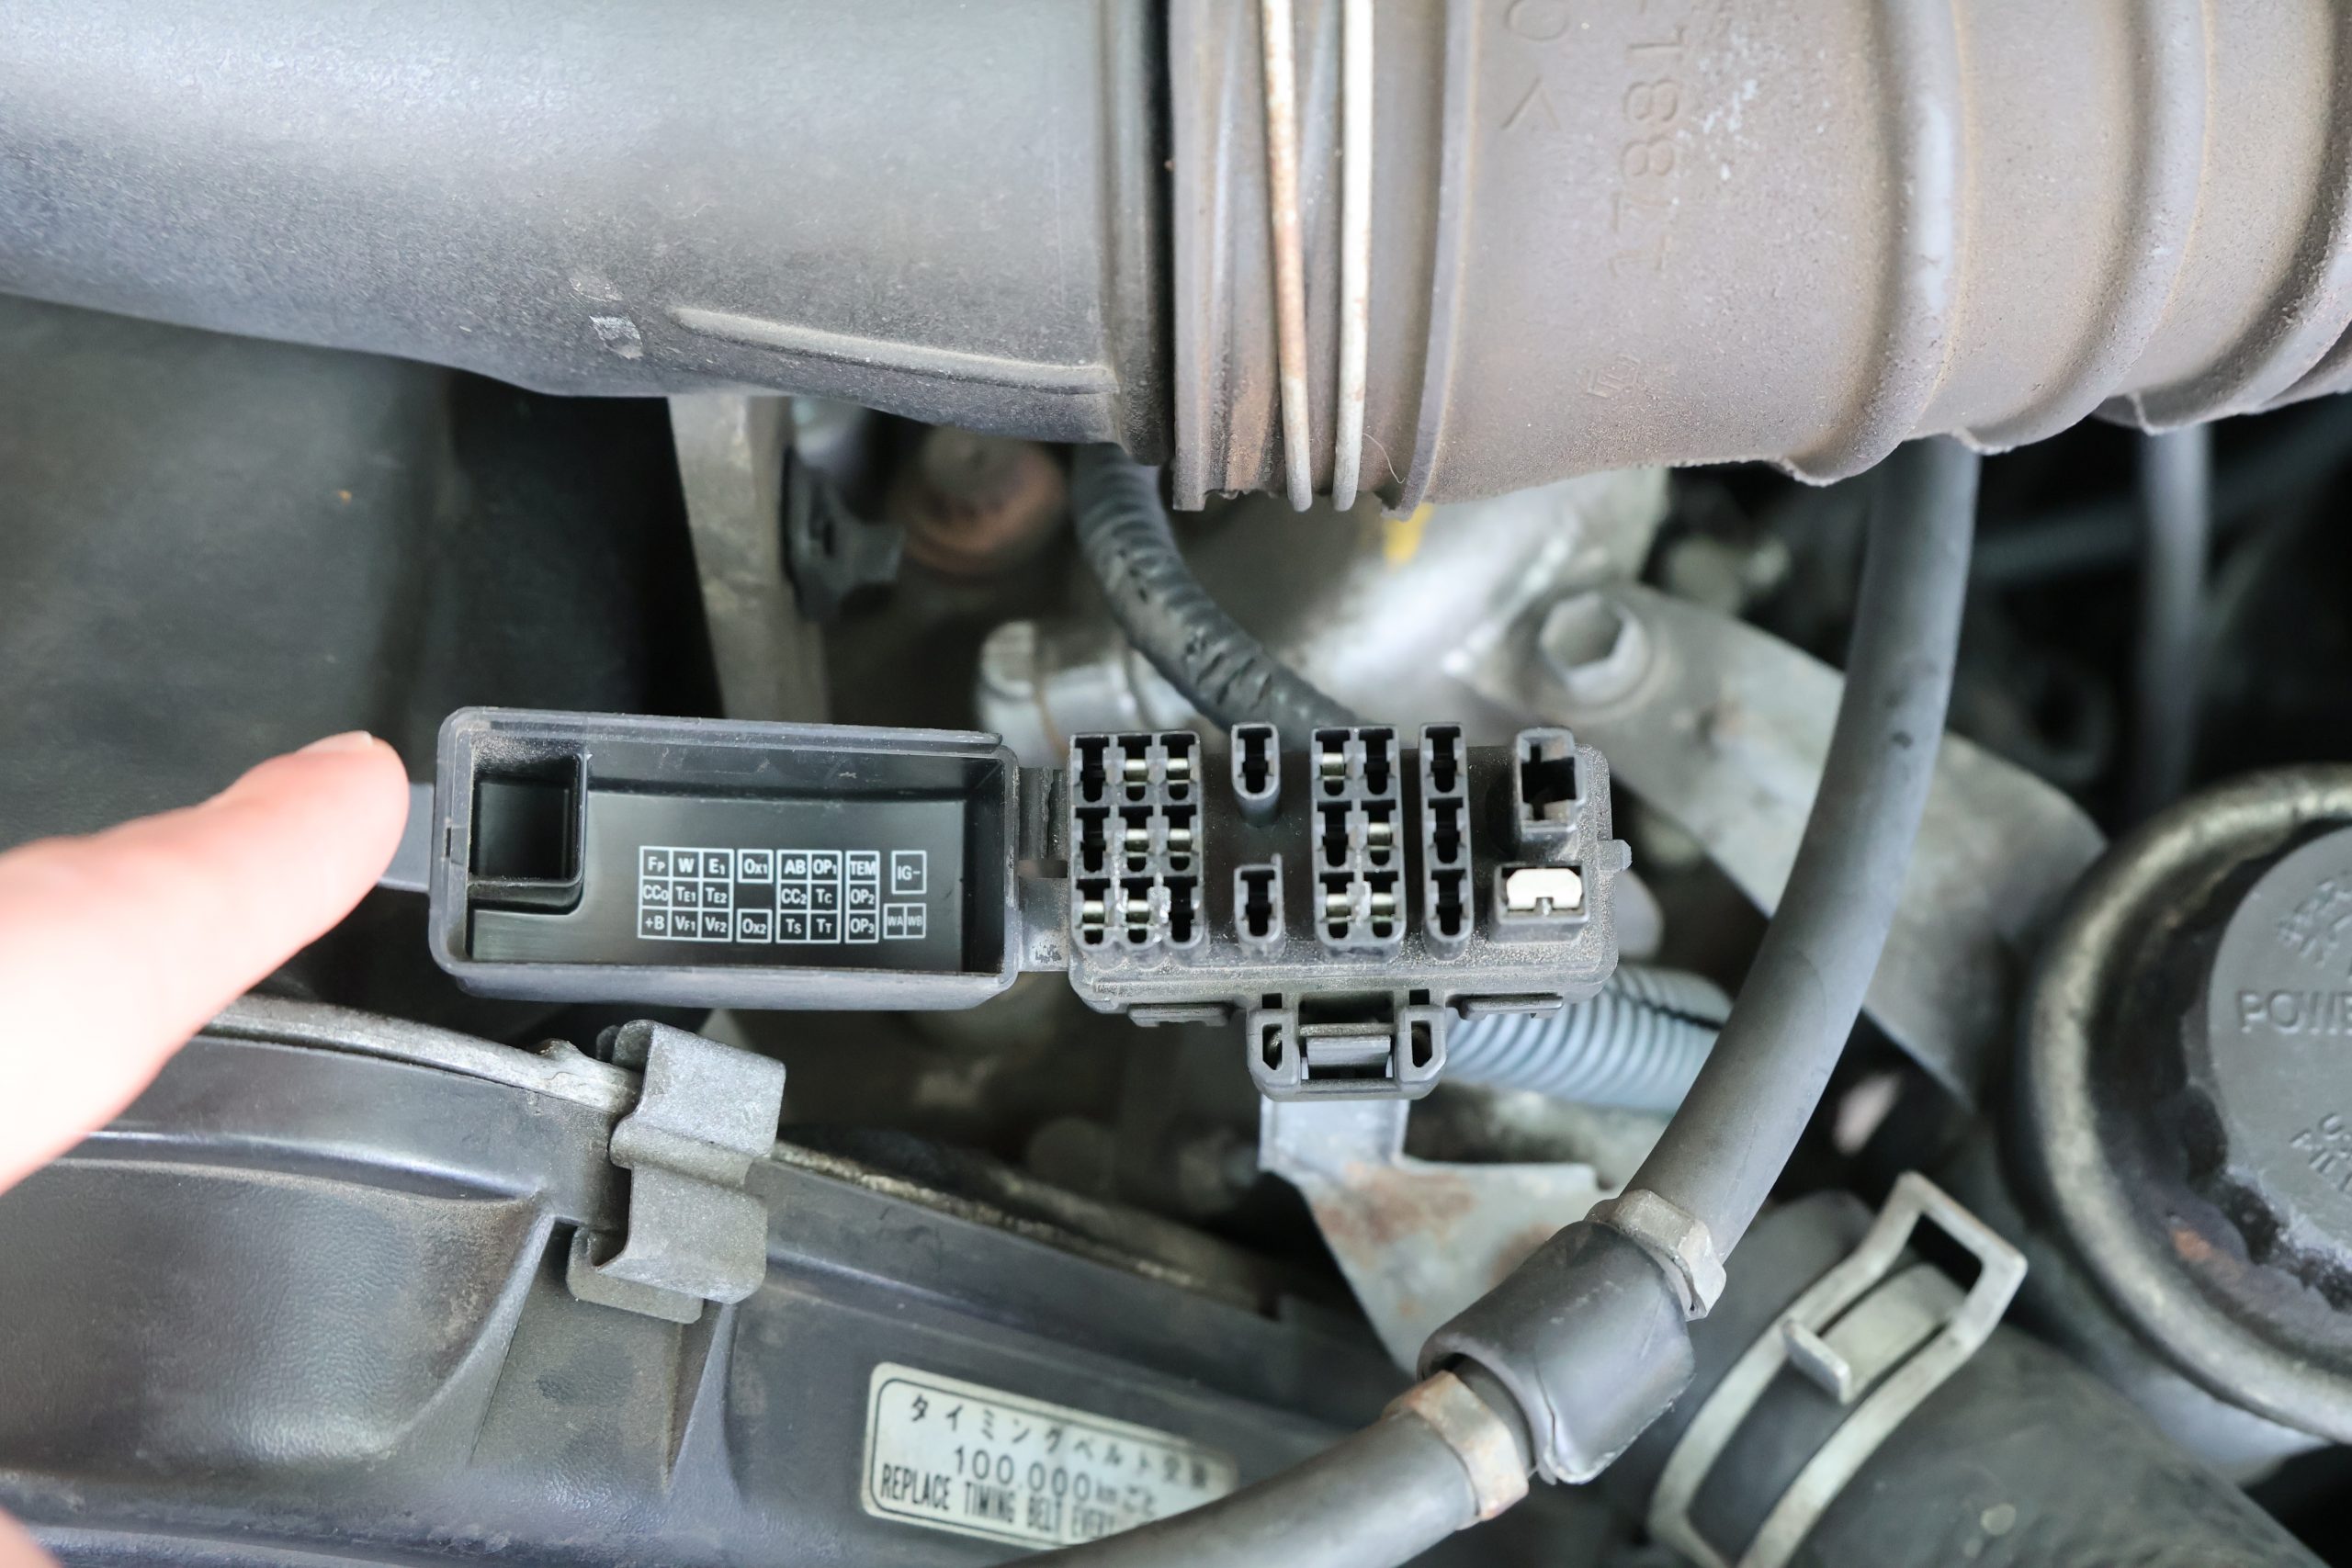
If your Toyota was built before 1996, it likely uses OBD-I. You don’t need a fancy computer to read these codes – you just need a steady eye and a common paperclip.
- Find the Diagnostic Port: Look under the hood for a small rectangular plastic box labeled Diagnostic or Check Connector. On some models, it might be a round plug near the steering column, or under the dash.
- The Jump: With the ignition OFF, use a paperclip or a small wire to jump (connect) terminals TE1 and E1. (There is usually a map on the underside of the diagnostic box lid).
- Read the Flashes: Turn the ignition to ON (don’t start the engine). Watch the Check Engine light. It will begin to blink.
- The Pattern: For example, two flashes, a short pause, and one flash equals Code 21.
- The Loop: The light will pause longer between different codes and repeat them in a loop.
- The Translation: Grab your factory service manual or head to troublecodes.net to see what that 2-digit code means. We detailed a few below
The OBD-II Era (1996–Present): The Digital Handshake
Starting in 1996, Toyota (and everyone else) switched to the standardized OBD-II system. This replaced the blink codes with a 16-pin data port.
- Find the Port: This is almost always located under the dashboard on the driver’s side. It’s a D-shaped, 16-pin female connector.
- Plug and Play: You’ll need an OBD-II Scanner.
- Budget DIY: A $20 Bluetooth dongle paired with a smartphone app is usually plenty for most enthusiasts.
- The Pro Move: A dedicated handheld scanner provides live data, which is crucial for troubleshooting ghost issues like a vacuum leak or a failing O2 sensor.
- Read the P-Code: Instead of a 2-digit blink, you’ll get a code like P0302 (Cylinder 2 Misfire). These codes are much more specific, making your DIY repair faster and more accurate.
💡 Pro Tip: Clear the Ghost
Once you’ve performed your DIY repair, you need to clear the code to see if the fix worked. On OBD-II, you can do this via the scanner. On OBD-I, the old school trick is to pull the EFI Fuse for 30 seconds or disconnect the negative battery terminal (just remember you’ll lose your radio presets!).
Why It Matters
Understanding these codes is the ultimate power move in car ownership. It prevents parts cannon repairs (throwing random parts at a problem) and keeps you in control of your vehicle’s health. Whether it’s a paperclip or a Bluetooth dongle, the tool is just the key – you are the one doing the work.
We have included a table of common Toyota ODB-I/-II Codes below, but pease note, this can vary by specific Toyota models, and we have friends that already do a better job of indexing these so please give them a visit: https://www.troublecodes.net/
OBD-I: The Paperclip Blink Codes (Pre-1996)
On these older systems, the light blinks in patterns. A Code 21 would be two blinks, a short pause, and one blink.
| Code | What it Means | DIY Starting Point |
| 11 | Momentary interruption in power to ECU | Check your battery terminals and main EFI fuse. |
| 12/13 | RPM Signal (Distributor/Crank) | Check the distributor wiring or the pick-up coil inside. |
| 21 | Main Oxygen (O2) Sensor | Often a failed heater element. Time for a new Denso sensor. |
| 22 | Water Temp Sensor Signal | Check the plug on the Coolant Temp Sensor (ECT). |
| 24 | Intake Air Temp Signal | Usually a loose plug on the air intake box or AFM. |
| 25/26 | Air-Fuel Ratio (Lean/Rich) | Look for vacuum leaks or a dirty fuel filter. |
| 42 | Vehicle Speed Sensor | Does your speedometer still work? Check the cable or sensor. |
| 51 | Switch Signal | Usually triggered if the A/C was on or throttle was pressed during testing. |
| 52 | Knock Sensor Signal | The Dreaded Code. (See Deep Dive below). |
OBD-II: The P-Code Era (1996–Present)
These require a scanner and provide much more granular data.
| Code | What it Means | DIY Starting Point |
| P0171 | System Too Lean (Bank 1) | The classic Toyota Lean code. Clean your Mass Air Flow (MAF) sensor first! |
| P0300 | Random/Multiple Cylinder Misfire | Check spark plugs, wires, and ignition coils. |
| P0401 | EGR Flow Insufficient | Carbon buildup in the EGR valve or a failed vacuum VSV. |
| P0420 | Catalyst System Efficiency | Could be a bad Cat, but check for exhaust leaks before the sensor first. |
| P0440/P0442 | EVAP System Malfunction | Start with the simplest fix: make sure your gas cap is tight. |
| P0125 | Insufficient Coolant Temp | Your thermostat might be stuck open, keeping the engine too cold. |
Deep Dive: The Dreaded Code 52
If you own a Toyota with a 3VZ-E (V6) or a 7M-GE (Inline 6), Code 52 is likely your arch-nemesis. It refers to the Knock Sensor Signal, but here is the DIY secret: It is almost never the sensor itself.
- The Problem: The pigtail wire that connects the sensor to the main harness becomes brittle from decades of engine heat. It cracks, loses its shielding, and the ECU loses the signal.
- The DIY Fix: Most owners find that replacing the $15 pigtail wire (which requires removing the intake manifold) fixes the issue. If you’re already in there, that’s the perfect time to do your Maintenance Reset on the intake gaskets and vacuum lines!
⚠️ The Golden Rule of Codes
A code tells you which circuit is malfunctioning, not necessarily which part is broken. A Lean Code doesn’t always mean you need a new sensor; it often means you have a $2 vacuum hose that has dry-rotted and cracked. Always inspect the wiring and hoses before buying the sensor!